Ad-Hoc distribution is certainly something which helps you scale the testing of your iOS application with apple letting you broadcast your app for 100 unique devices. But just as everything’s very controlled in an iOS environment, ad-hoc application distribution is bureaucratically confusing- unless we go through apples 500+ pages developers manual.
In this post as my other posts there special mention for Rhomobile apps. In case you’re not creating a rhomobile/Rhodes app plz skipt those steps beginning with Rhodes.
Lets Begin
Step 1 : Before you begin, you must be registered ios developer at developer.apple.com. Also, your developer certificate, distribution certificate should be added in the keychain.
Step 2 : In your apple ios development profile at developer.apple.com make a new provisional profile in distribution and choose ad-hoc in that. Also, select all the devices on which the application will be installed (max upto 100 devices).
Step 3 : Download the same and load it in xcode.
Step 4 : For Rhodes app – You can see all the details of the profile which we will later use in your Rhodes application’s build.yml by clicking organizer in the right side of xcode.
Step 5: For Rhodes app – following details will need to be filled in build.yml. Lets take an example :
iphone:
provisionprofile: xx32xx42-Axx1-xxCx-xxxx-xQWxERxTYxxU
sdk: iphoneos5.0
codesignidentity: “iPhone Distribution: your company name”
entitlements: “”
configuration: Release
BundleIdentifier: com.companyname.appname
BundleURLScheme: app_name_type
Now let’s map what is above in these yml settings to what you see in your xcode organizer:
Provisionprofile : this is the Provisional identifier
Sdk : this is just the sdk version
Code signidentiy : add your common name from distribution certificate from keychain.
Entitlements : just leave it blank
Configuration : has to be release for ad-hoc.
Buncleidentifier : you can see this as app identifier but there is a long code before this in organizer u can ignore the long code and simply take com(which is default)[dot]distribution_name[dot]application_name
BundleURL scheme : just name your app
Step 6 : For Rhodes app – Now what lets load your Rhodes application in xcode by following two steps : http://docs.rhomobile.com/rhodes/build
$ rake switch_app
$ rake build:iphone:setup_xcode_project
This will create a xcode project in the Rhodes source code folder. Which you can see from your build.yml. Navigate to the /platform/iphone folder and open rrhorunner.xcodeproj. This will open your Rhodes application in Xcode.
for more information on ios build with rhomobile, plz check ios build section at Rhomobile Docs.
Step 7 : Create a new configuration in your Project Settings
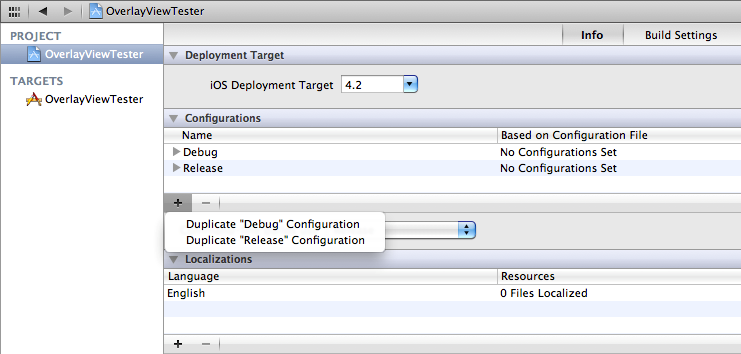
I am not describing here how to create info.plist file which is no longer required in case of xcode4, but definetly is necessary for testflight (I’ll try to include that later in this post). Create an Ad Hoc Distribution configuration. Click on your project in the Groups & Files pane and then select your project in the column that shows your project and targets.

If you are not already on the Info screen, click the Info tab. Next click the ‘+’ button and select Duplicate “Release” Configuration.
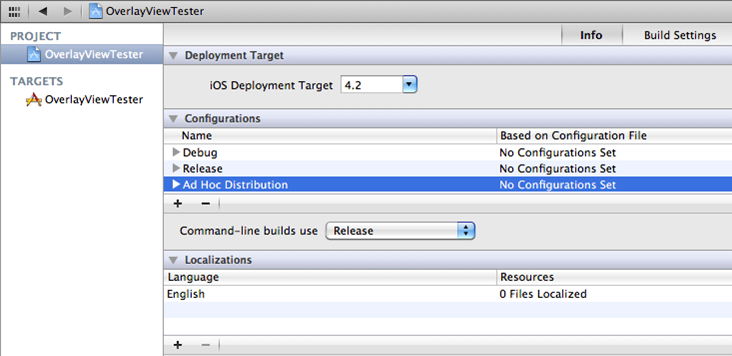
Give the new configuration a name, preferably ad-hoc so that you remember it 😛
Setup 8 : Setting up Target
Select your Target (below your Project), click on code signing identity property and select “don’t code sign”. Also select default iPhone Distribution for Ad-Hoc distribution and iPhone developer for debug, development and release.

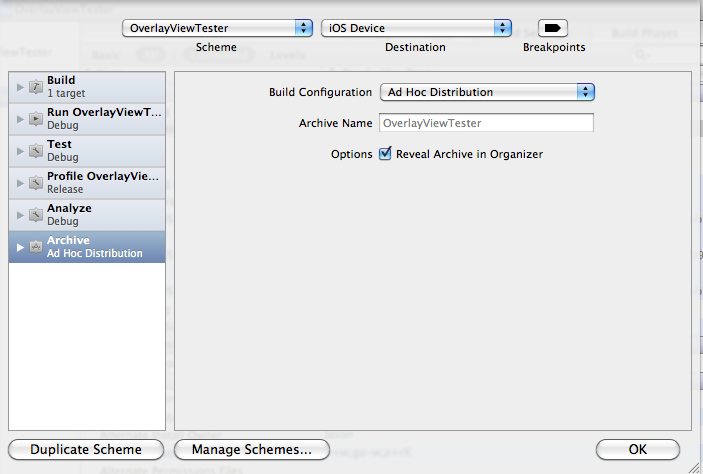
Step 9 : Setting up archive scheme
From the drop down menu in your tool bar next to the Run and Stop button, select Edit Scheme. Select Archive in the left pane and then set the Build Configuration to your Ad Hoc Distribution and click OK.
Step 10 : Yes its almost done !
From the top menu select Product and then click archive, your application build will be created.
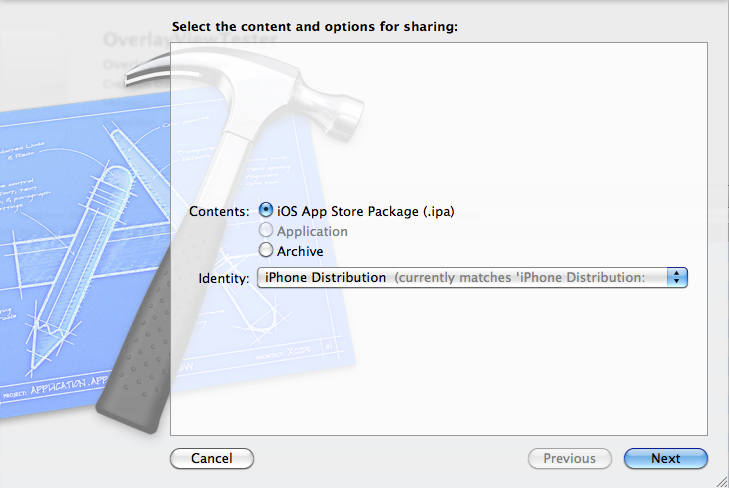
Step 11 : Create installable ipa and share J.
After build is created successfully, organizer will open automatically to create the IPA file, with the archive highlighted, click the Share button and then confirm the provisioning profile you want to use. If you only have the one distribution provisioning profile it should default to the correct one. Click Next and then give the IPA file a name and save it.
Step 12 : To distribute your .ipa simply attach the file and mail it. Double click the ipa file loads it into itune, sync your itune and your application is installed on your device.
And its done !!!